How to Create a Screen Mockup in Photoshop - MUO - MakeUseOf
Many designers and artists use mockups to display their work. In this screen mockup tutorial, you’ll learn how to create mockups from scratch using smart objects and masks in Photoshop. It’s easier than you think. Let’s jump right in.
What Are Mockups, and How Do They Work?
Mockups are images that are formatted in a way for you to replace part of the image with your own design. These are often seen used for screen designs, packaging designs, or clothing.
You’ll find many free PSD mockups online that you can use. These mockups are provided with a photo or even a computer-generated scene and completed with a smart object layer, which is how your design can be applied to the mockup.
The smart object manipulates the perspective of your design so that a flat design can be warped onto whichever surface in the photo, such as a phone screen or a t-shirt. You can download readymade mockups with the smart object layer placed onto the design, all you need to do is add your design and the smart object does the rest for you.
It’s very simple to create your own and include a smart object layer that works with your photo and enhances your designs. Let’s get started with the tutorial.
1. Prepare Your Photo
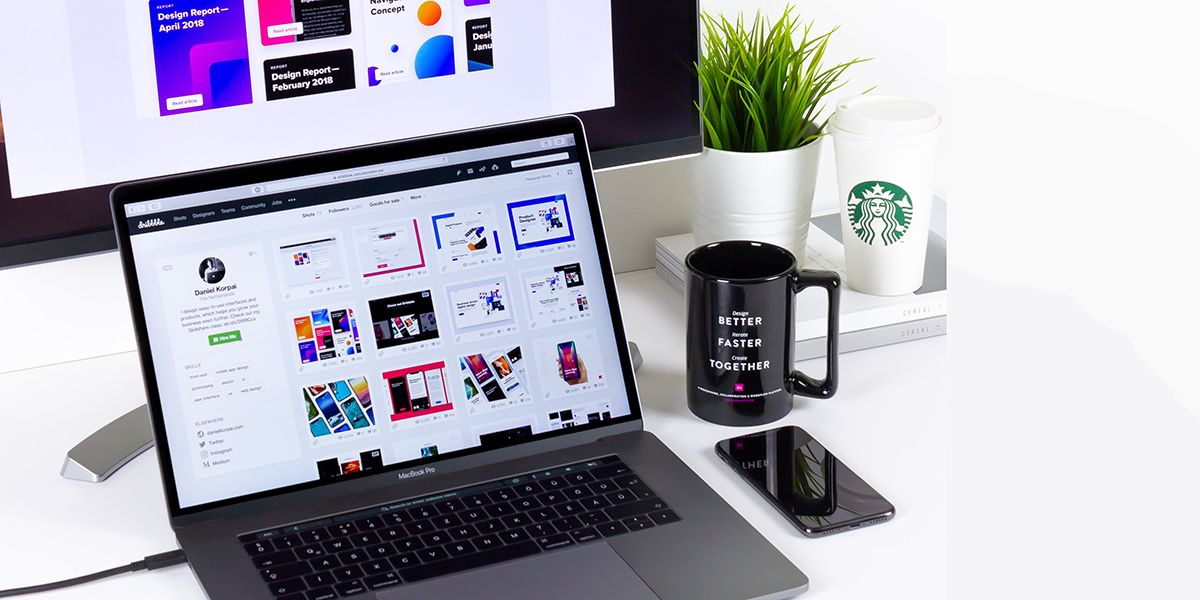
You need to start with a high-quality photo of a screen. If you look through stock photography websites, you’ll notice that images of screens have few distractions around the subject.
Consider the look of your final design that will end up on the screen and ensure the rest of the photo follows a similar theme. If your design is feminine and light, style the photo with a small vase of flowers or floral fabric. If your design is for a coffee advert, include a coffee cup next to the screen in the photo.
Overall, ensure there is a clean background around the primary subject in your photo (which will be a screen of some sort).
You can use your own photo or search sites like Unsplash or Pixabay for what you need. If it requires editing, now is the time to do that.
2. Create a Smart Object
To create your mockup, begin by opening your screen photo in Photoshop. Then, we need to create a smart object. To do this, use the Rectangle Tool (U) and draw a rough rectangle on the screen of the image. Pick a fill color for your rectangle and remove the stroke.
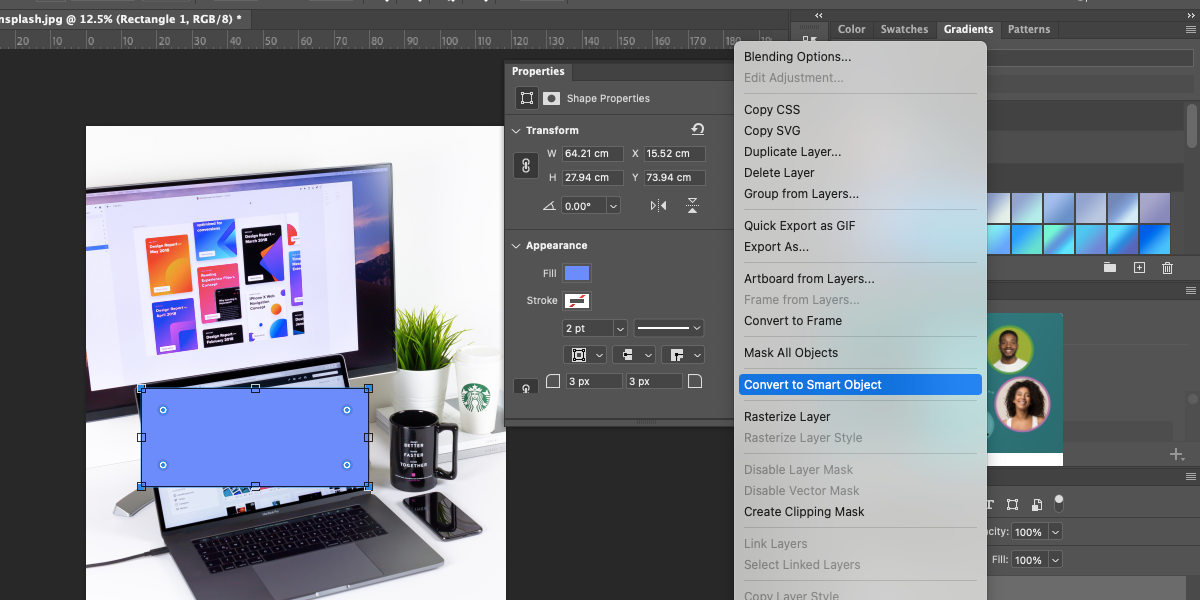
On the Layers Panel, right-click the layer with your rectangle and click Convert to Smart Object. From here, we can transform the smart object. To turn on the Transform Tool press [Cmd + T] on Mac and [Ctrl + T] on Windows.
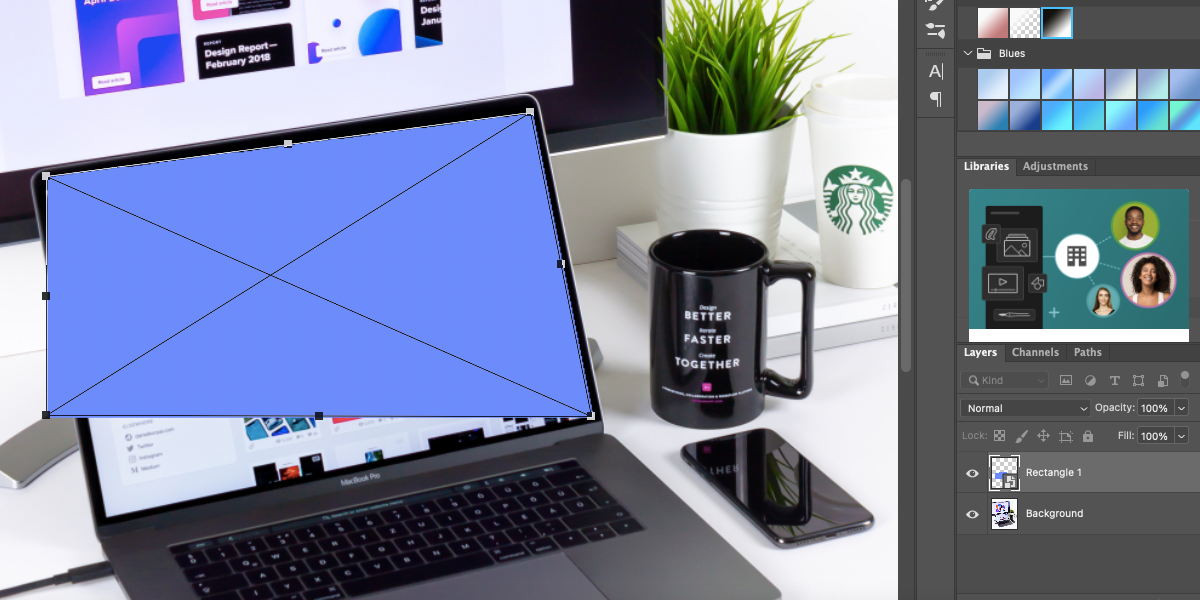
With the Transform Tool on, hold the Cmd (Mac) or Ctrl (Windows) button down and hover your cursor on a corner of the rectangle until it turns into a white arrow. Using this arrow, click and drag each corner of the rectangle to the corners of the screen in the photo.
Once the rectangle is lined up, double-click anywhere to apply the effect. This has now created a smart object, which is where your design will go.
3. Add a Mask if Necessary
If you have additional hindrances in your image, like the laptop screen obstructing the computer screen in our image, you can use a layer mask to work with your smart object.
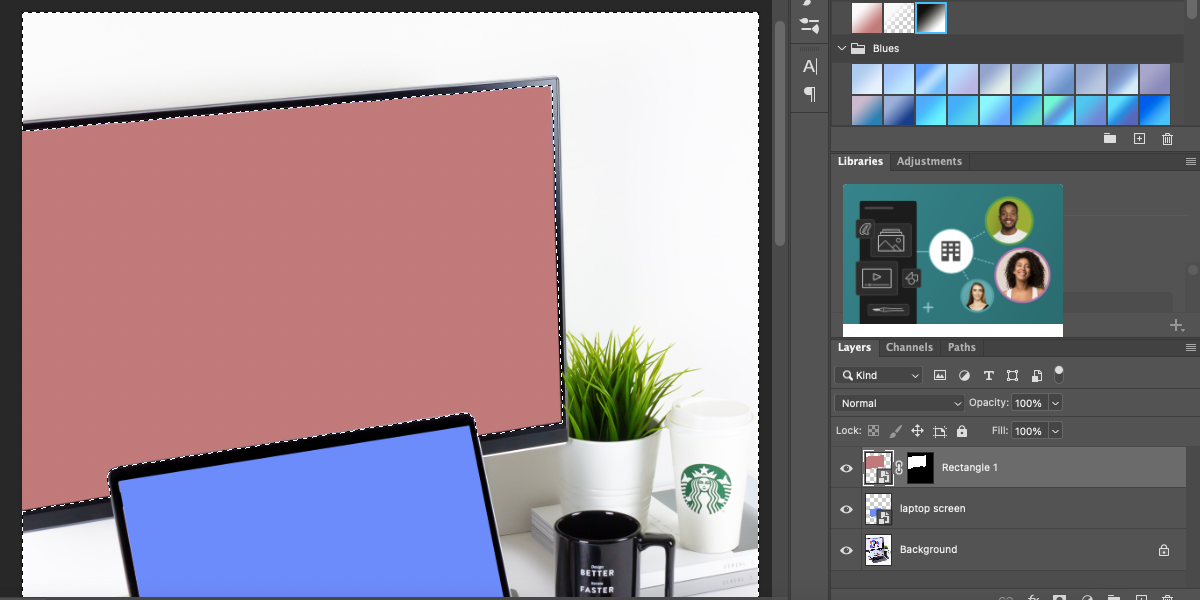
Create the smart object that covers the obstructions by using the steps in the previous section. Then, on the Layers Panel, click Create Layer Mask. Using a selection tool (L), select everything in the photo, excluding the screen where your mockup will be.
Once everything else is selected, hit the Delete key on the keyboard. The Layer Mask thumbnail in your Layers Panel will show a white shape where the screen is and everything else will be black and masked out.
4. Add Your Designs
Once you’ve created a smart object, it’s time to add your design to your mockup.
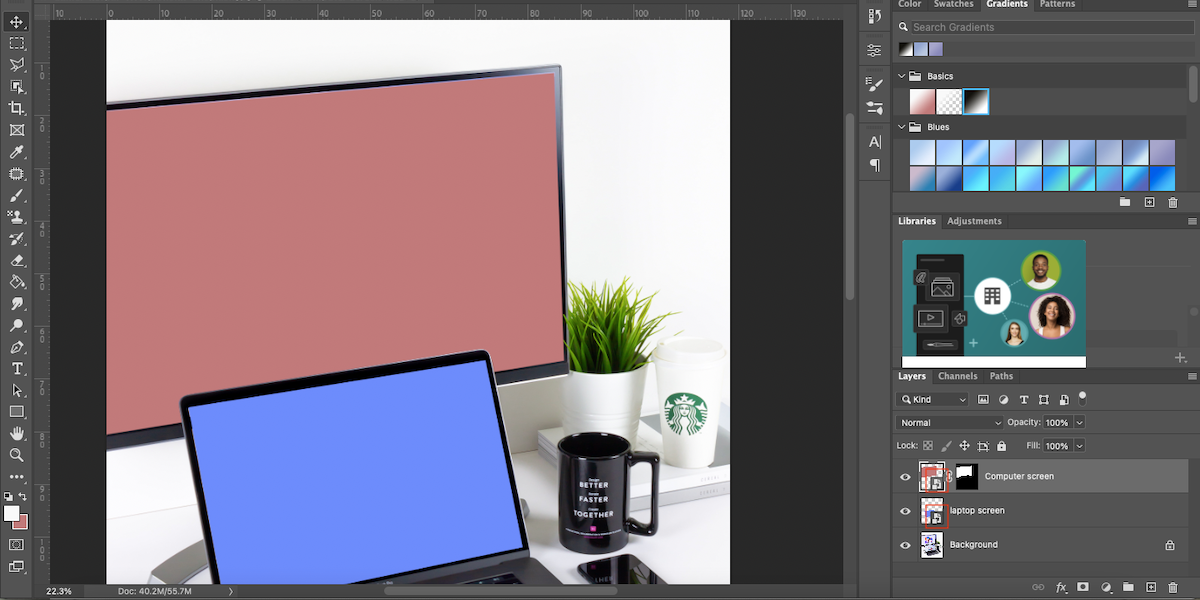
Open your intended design in Photoshop and select all by pressing [Cmd + A] on Mac or [Ctrl + A] on Windows. Copy the selection and go back to the window with your mockup design. Find the layer that holds your smart object and double-click the smart object box in the Layers Panel. This opens the smart object in a new window.
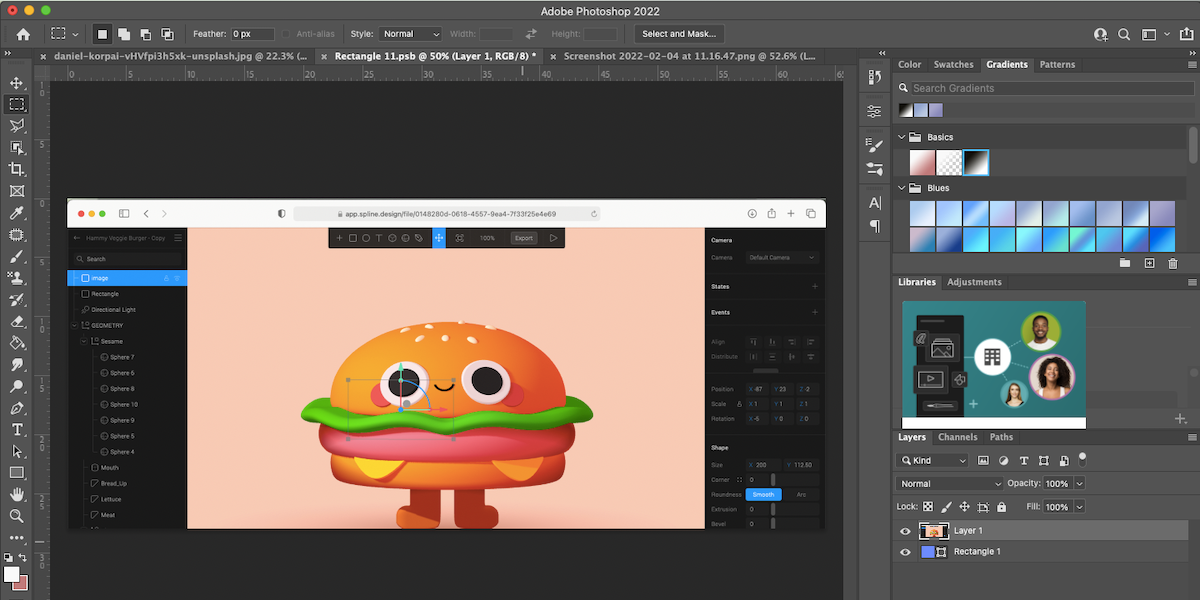
Now, you can paste your previously copied design. Transform the size so it covers the entire rectangle. Once the size is set, save the image by hitting [Cmd + S] on Mac or [Ctrl + S] on Windows. Exit out of the window once it’s saved.
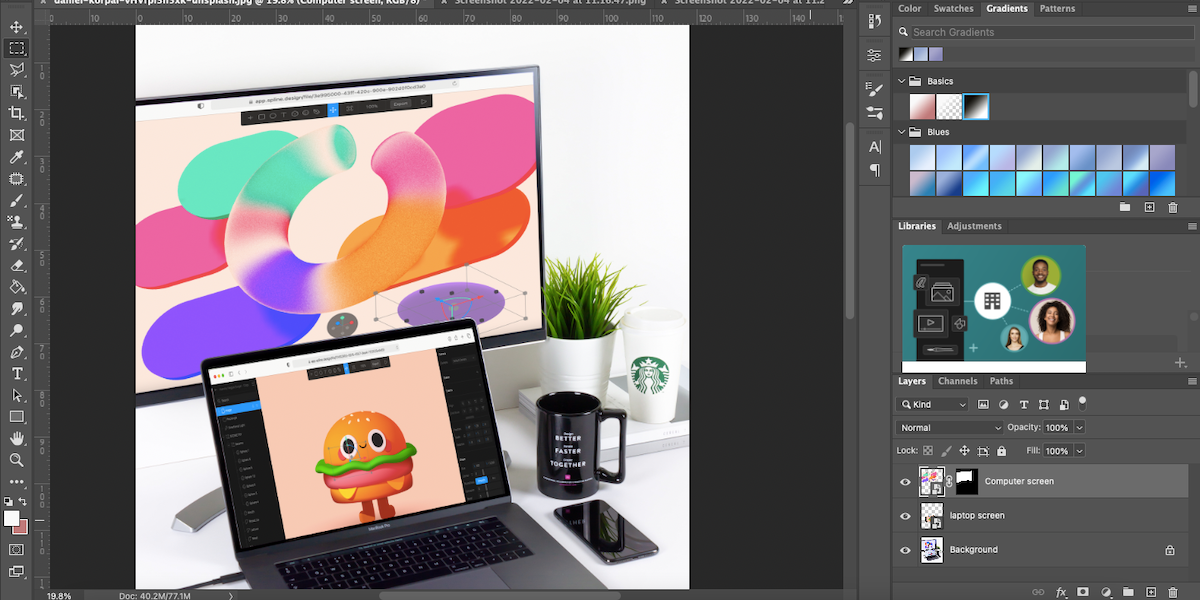
Go back to the main window; you should see your mockup design completed with your new screen.
5. Make It Realistic
You could leave your mockup as is, but to take your design to the next level, you can add realistic glare or reflections to the computer screen, above your smart object.
To view the natural glare, use the Visibility button on the smart object layer. Look at how the light falls on the screen in the original photo. When you turn the visibility on, that natural screen glare disappears and looks a little flat.
Select the Layer Mask thumbnail on your intended layer, right-click it, and choose Add Mask To Selection. Then, add a new layer and click the gradient tool. We’re going to use a black and white linear gradient, putting the white where the light hits your screen.
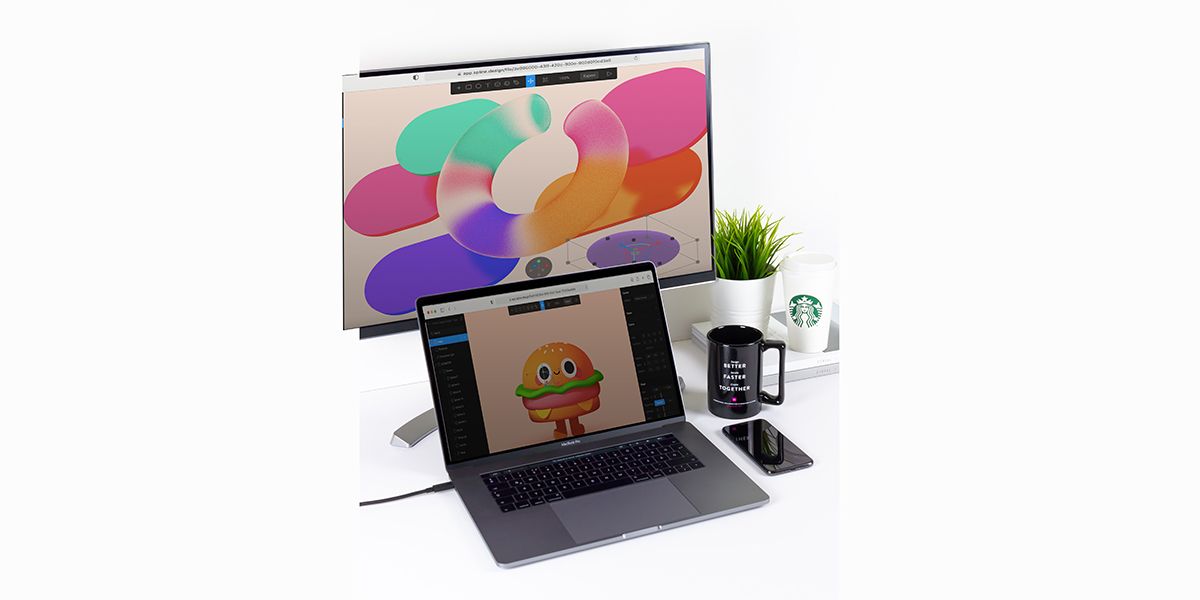
With your gradient in place, change the blending mode of the layer to Multiply. This gives the polarizing effect of screen glare which makes your mockup look more realistic.
Now you have a completed mockup that you can save as a PSD to use for multiple designs in the future. All you need to do is change the image in the smart object layer.
Create Your Own Screen Mockups in Photoshop
Using your own mockup photos and designs gives your work more integrity and will separate you from other artists. It adds a personal touch to your designs and gives you more control over the final result. Refer back to this simple guide to create your own screen mockup from scratch.
Behance vs. Dribbble: Which Platform Is Better for Artists?
If you're a graphic designer or an artist, you need a platform to showcase your work. Here, we compare Behance and Dribbble.
Read Next
About The Author
Ruby Helyer (15 Articles Published)
Ruby is a writer in MUO’s Creative category, focusing on writing about design software. Having worked as a designer, illustrator, and photographer, Ruby also has a BA in Graphic Communication and an MA in English with Creative Writing.
Subscribe to our newsletter
Join our newsletter for tech tips, reviews, free ebooks, and exclusive deals!
Click here to subscribe

Post a Comment for "How to Create a Screen Mockup in Photoshop - MUO - MakeUseOf"